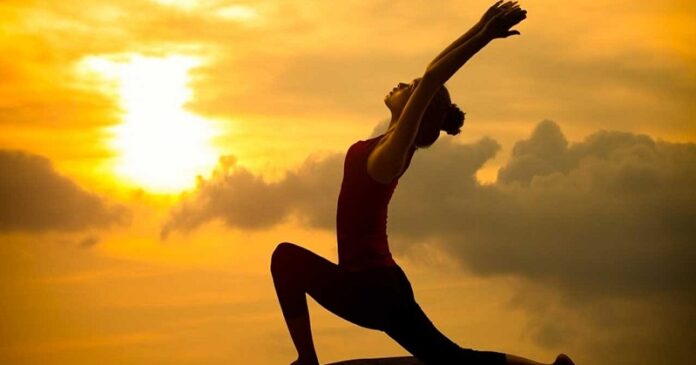
We can never imagine our lives on earth without the sun. It is the prime source of energy for all the living beings on our planet. That is why ancient people used to pay respect to the sun in the form of Surya Namaskar. However, nowadays, besides paying respect, it has also become a major source to become healthy and remain fit. The 12 steps Surya Namaskar is not only an asana rather it’s a full-body workout that has an immensely positive impact on the body and mind.
Surya Namaskar is a set of poses/asanas which is performed in the morning. Continue reading to learn the names of Surya Namaskar steps with images.
1) Pranam asana – Prayer Pose
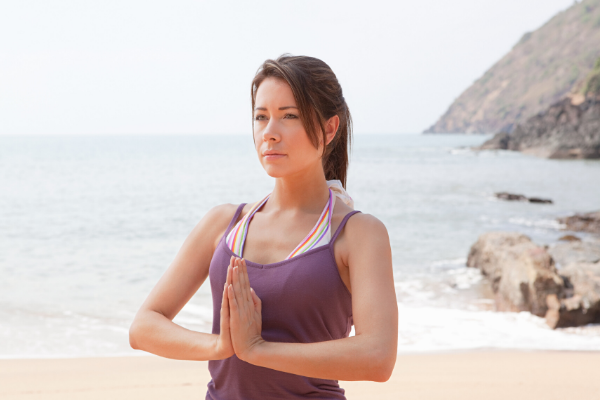
In one of the 12 steps of Surya Namaskar, stand in a straight posture keeping your feet together. Divide your weight equally on both feet and relax your shoulders. After that, lift both arms up from the sides as you breathe in, and then, bring your palms together in front of the chest as you exhale.
Tips: Keep your chest expanded and relax your shoulders.
Benefits: Helps center the mind, Reduces anxiety, and stress
2) Hasta Uttanasana – Raised Arms Pose
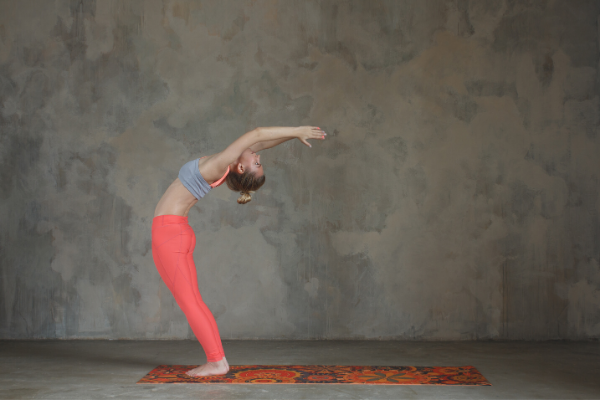
In the second step out of the 12 steps of Surya Namaskar, lift the arms up and back as you breathe in. Keep your biceps close to the ears and stretch the whole body up from the heels.
Tips: To deepen the stretch, you can push your pelvis forward.
Benefits: Reduces backache, stretches shoulders, and improves digestion
3) Padahastasana – Standing Forward Bend
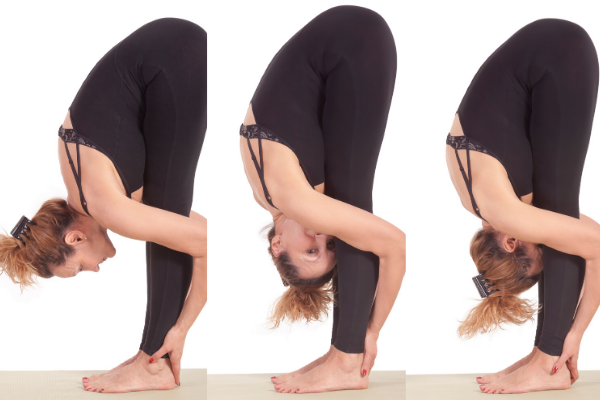
Among the names of Surya Namaskar steps, it is one of the difficult ones. For this step, bend forward from the waist while you breathe out and keep the spine erect. And, bring the hands down to the floor as you exhale completely. Touch the floor beside your feet.
Tips: You can bend your knees in order to touch the ground. Then, try to straighten your legs. Also, do not move your hands until the step is completed.
Benefits: Reduces insomnia, Relieves anxiety, and strengthen thighs
4) Ashwa Sanchalanasana – Equestrian Pose
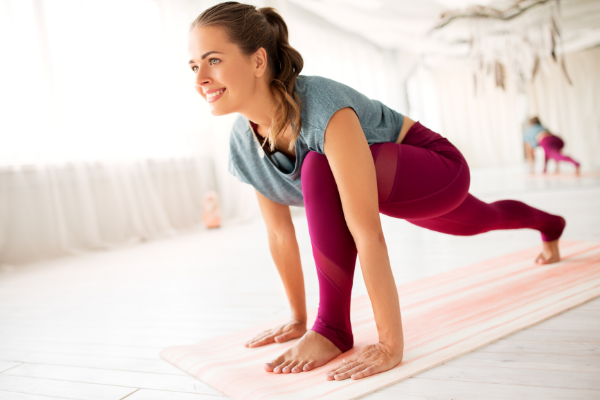
In the fourth step out of the 12 steps Surya Namaskar, push your right leg back as far back as possible while you breathe in. Touch the right knee to the floor and lookup by stretching your neck as much as possible.
Tips: The left foot should exactly be between palms.
Benefits: Improves hip flexibility, increases lung capacity, and tones kidney and liver
5) Chaturanga Dandasana – Stick Pose
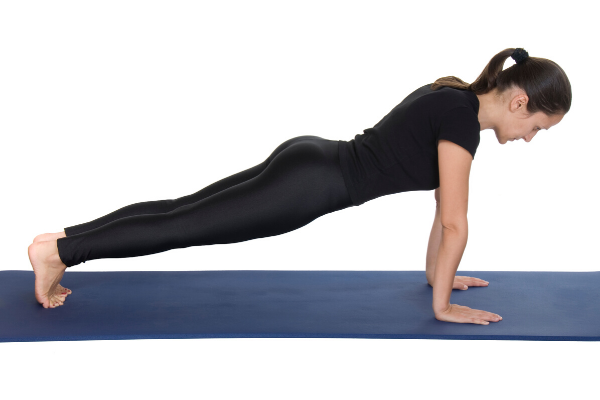
After taking the right leg back, it is time to take your left leg back as well. While breathing in, make sure that your whole body is in a straight line. This asana builds your core strength and keeps your posture right as well.
Tips: Make sure that your arms are perpendicular to the floor.
Benefits: Strengthens arms, tones abdomen, and builds core strength
6) Ashtanga Namaskara – Salute With Eight Points
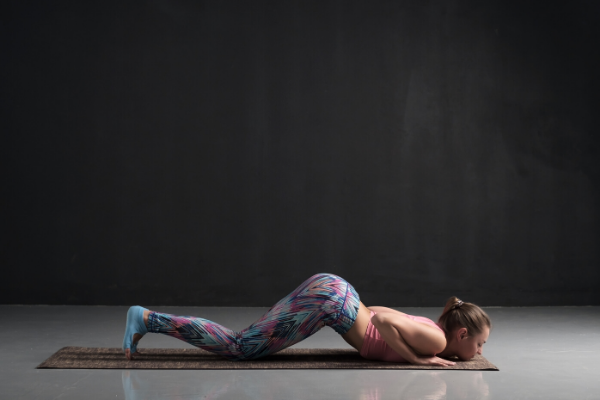
While breathing out, bring your knees down to the floor. Rest your chest and chin on the floor while taking the hips slightly back and sliding forward. Hands, feet, knees, chest, and chin should touch the floor.
Tips: Make sure that your pelvis is just above the floor.
Benefits: Strengthen shoulders, Expands chest, and improve spine flexibility
7) Bhujangasana – Cobra Pose
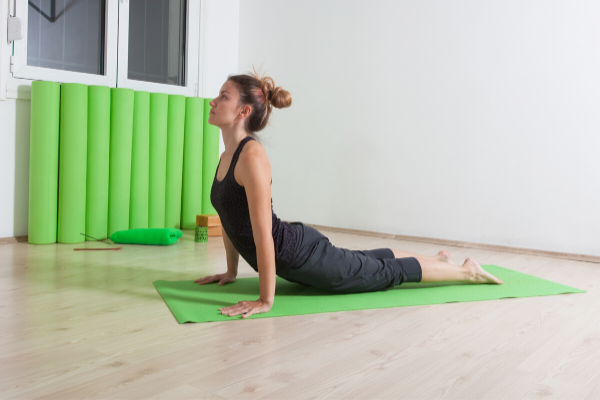
In this step of Surya Namaskar steps with images, slide forward and raise the chest up. You may keep your elbows bent in this pose as well. Look up at the ceiling by stretching your neck as much as possible.
Tips: Make a gentle effort to push the chest forward when you inhale and vice-versa. Also, tuck the toes under the floor and not point it.
Benefits: Tones abdominal muscles, reduces symptoms of fatigue, and asthma
8) Adho Mukha Svanasana – Downward Facing Dog Pose
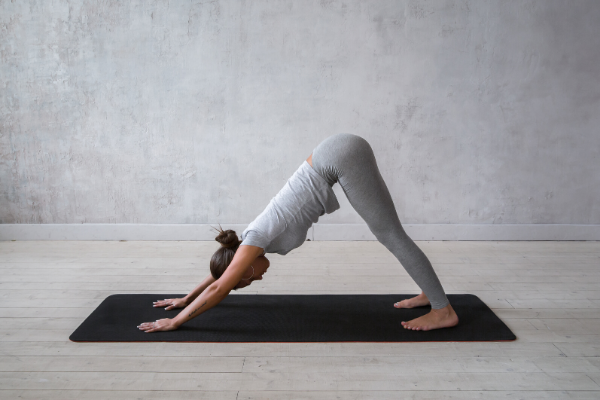
Lift the hips and the tailbone up while breathing out. And, try to touch your heels on the ground and bring the body into an inverted ‘V’ pose. This is one of the most effective Surya Namaskar poses.
Tips: Try to touch your heels on the ground.
Benefits: Improves blood circulation and increase height
9) Ashwa Sanchalanasana – Equestrian Pose

Now again, bring the right foot forward in between your palms while breathing in. The left leg will be in the back and its knee will be touching the floor. Then, press the hip down as much as possible and lookup by stretching your neck as much as possible.
Tips: The right foot should exactly be between palms. Also, try to push your hips down to the floor as well.
Benefits: Builds willpower, stimulates the digestive system, and strengthens quadriceps
10) Padahastasana – Standing Forward Bend

In this asana, bring the left foot forward and keep the palms on the floor while breathing out. However, in the initial stage, you can bend your knees if necessary.
Tips: Try to touch your nose in the knees if possible.
Benefits: Stretches hamstrings and strengthens knees
11) Uttana hastasana – Raised Arms Pose

After that, bring yourself back up and roll the spine while breathing in. Bend backward a little bit and raise the hands up as well. You can stretch it up more by pushing the hips slightly outward.
Tips: Make sure that your biceps are beside your ears so that they could be stretched upward.
Benefits: Reduces backache, stretches shoulders, and improves digestion
12) Pranamasana – Mountain Pose

This is one of the easiest Surya Namaskar poses where you have to first straighten your body and then, bring your arms down. After that, just feel the sensations in your entire body while relaxing and breathing normally.
Tips: Make sure to keep your posture straight.
Benefits: Helps center the mind, reduces anxiety, and stress

